Las Vegas, Nevada UNLV Runnin’ Rebel Basketball Tutorial
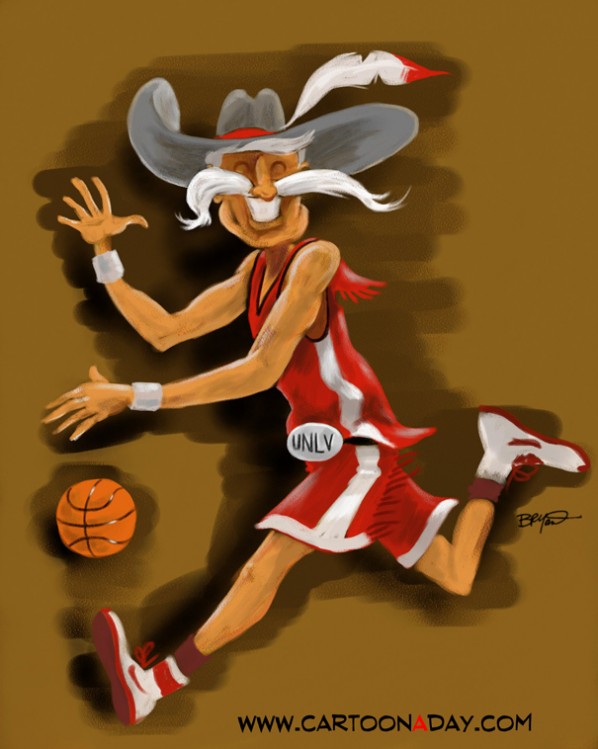
Yay, it’s tutorial time! Running Rebels Basketball is the subject matter, a piece i did for LasVegas.Net Magazine. I’ll link the full story when it’s online.
Here’s the finished Art:
FIRST STEP
This may or may not be obvious, but we start with a pencil sketch. Some artists think this is the most important, most crucial stage of their process. To me, it’s just a sketch. Sketching is my rough draft on top of which I layer the final piece. So be bold, go big, or go home.
STEP Two
Now You’ve got to get it into the computer. Grab yor scanner. It doesn’t have to be high resolution unless you’re wanting to retain some of the pencil strokes in the final piece. As a general rule, I always scan at print resolution (300 dpi). If you don’t have a scanner, a camera works too. If you don’t have a camera, try Kinkos’s. They’ll scan it for ya, or even e-fax it to yourself. Beyond that, you’re left with a Wacom tablet and sketching right into the program. I use Corel Painter 11 for most direct-to-digital sketching.
Once it’s in either Painter or Photoshop, create a NEW LAYER>Set to MULTIPLY, and FILL it with a color of your choice. I like working with browns since I can add lighter colors on top to buildup flesh tones. Greay is my second favorite since it’s neutral.
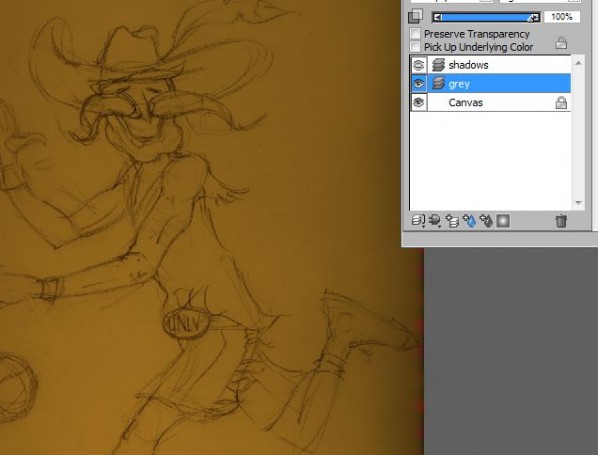
Optional GREY Layer
STEP Three
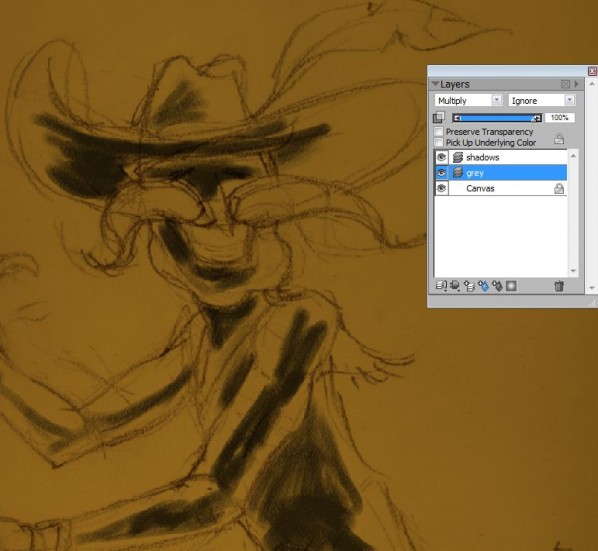
Create NEW LAYER>set to MULTIPLY (again). Grab your favorite big, soft brush and lay down blacks for shadows. I tend to do this very quickly and with general strokes. This gives me a general direction for what I THINK the shadows should be. I’m not using reference for this project.
STEP Four
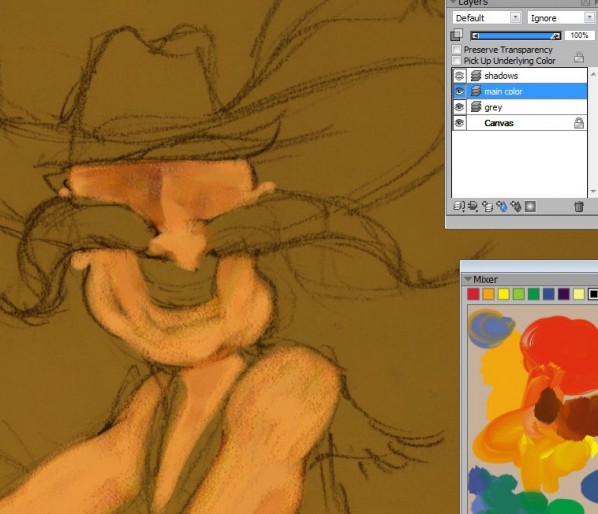
Create NEW LAYER>DEFAULT. Default is a “Normal” layer. Now the real fun starts. I’m next using a Medium OIL BRUSH, with a variable size setting, in conjunction with the trusty Wacom talet, MAX size is about 25 pixels. On your new Normal layer, start mixing and laying down colors in the tone you’relooking for. In this case, tanned flesh color of a Cowboy.
STEP Five
Keep going with the same brush or experiment. You can also keep brushing on the same layer, but if yo have enough RAM to keep the program running smoothly, I suggest creating new, additional layers for different color groups. That way you can easily change the global hue, tint, opacity, etc.
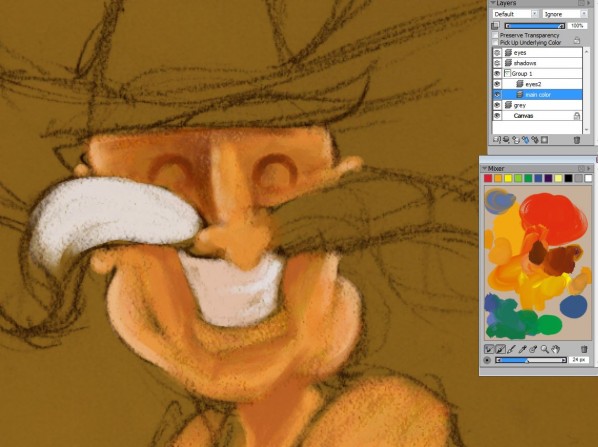
More details on white. I think I switched here to a BRISTLE BRUSH, or I just dialed down the existing brush I was using.
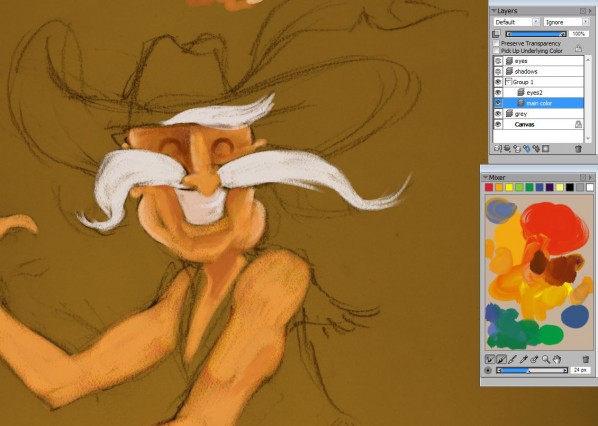
STEP Six
Once I get the big brush color laid down, I grab my favorite media brush with some texture , ARTIST’S Pastel Chalk. I love the grainyness and general feel of this variable pressure brush. I start layering darker and lighter strokes on top of the loose color below.
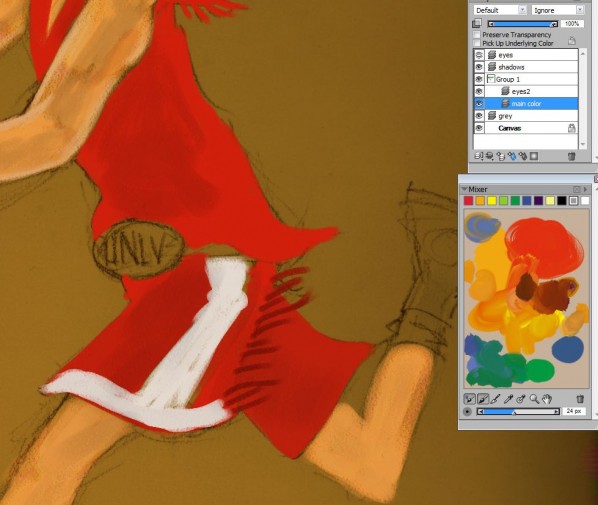
Here’s a detail of my palette. Somewhere off the main body of the art, I brush on the color I’ve mixed in it’s raw form, then keep adding it’s color variants. This makes it super easy to gabk to that exact, original color while just holding down (OPT) to get the eyedropper and the color. Later, I’ll simply marquee the area and delete it.
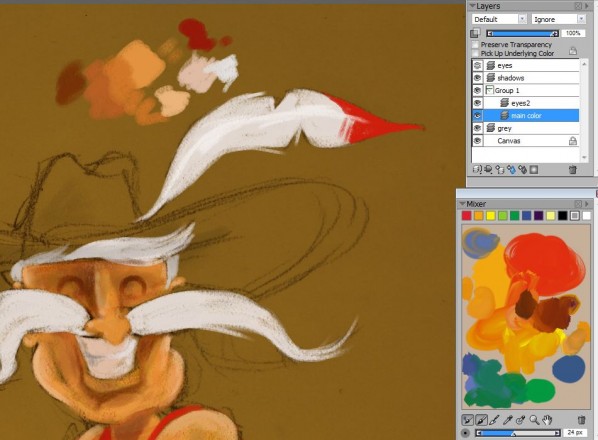
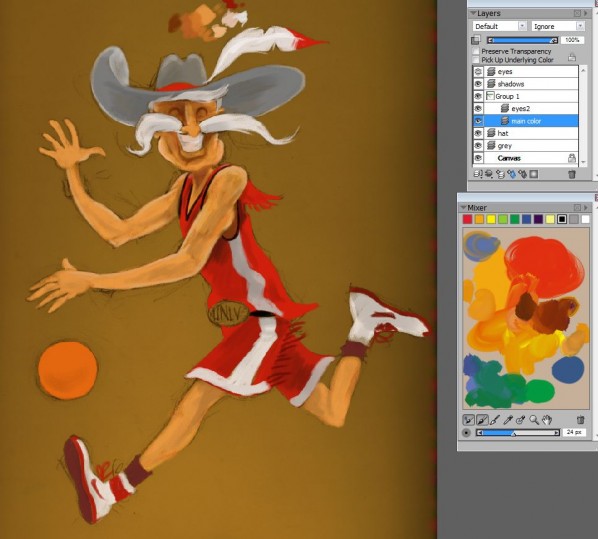
STEP Seven
Now Starts the details. Same brush, PASTEL CHALK, but dialed down to a 5-6 Pixel width. Depending on which model Wacom Tablet you have this is easy (I have several, including the sweet Cintique-draw right on the screen-But today it’s the Medium Intuos 4 with the iPod like Clickwheel). The clickwheel lets you dial the brush size up and down like you’re fast forwarding through your least favorite Paula Abdul song. You can see, with this new, smaller brush size I’ve detailed the belt buckle and started on the Basketball.
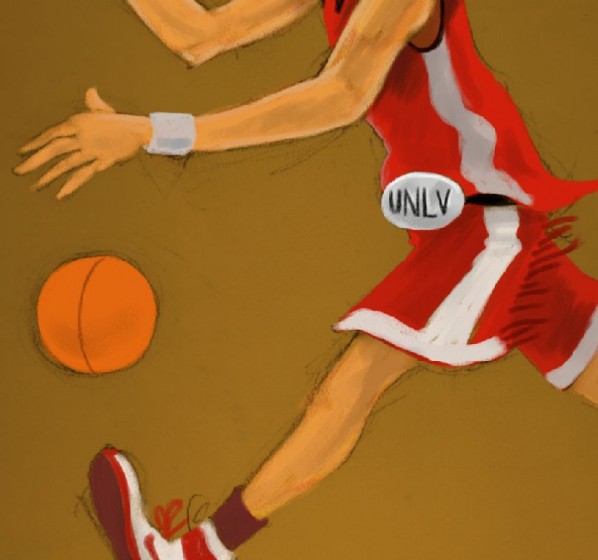
Basketball detail: Simple Black first, followed by a jot of white for highlight. Then I jumped back up to the SHADOW LAYER and softly applied a little shadow around the seams.
STEP Seven, Detail Continued
I’m showing you more of the same process here, with the same small brush. I dial up the size when it’s convenient and easier to fill in large areas.
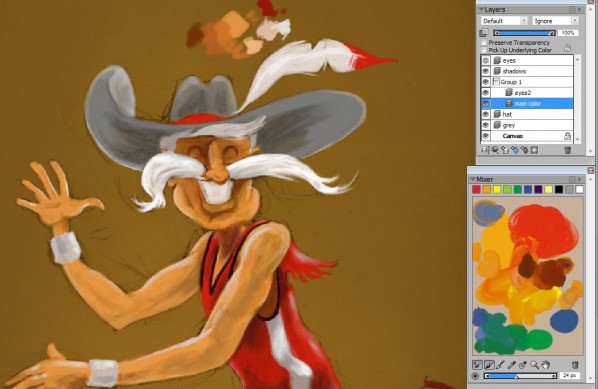
STEP Eight, Cleanup
Now I think I’ve got as much detail as I want in this particular piece. I’m about an hour into the project at this point, and magazine deadlines are ugly, and the editors even uglier, so I’m wrapping it up. So, for speed’s sake, I simply selected the CANVAS LAYER (where the sketch lives) SELECT ALL> Then DELETE. Yup, just deleted it. I don’t always do this. Most of the time I’ll grab an eraser for the first time in the process and try cutting out the extraneous pencil marks, leaving some pencil in the drawing. But after deleting the pencil, I felt I could live with this level of detail.
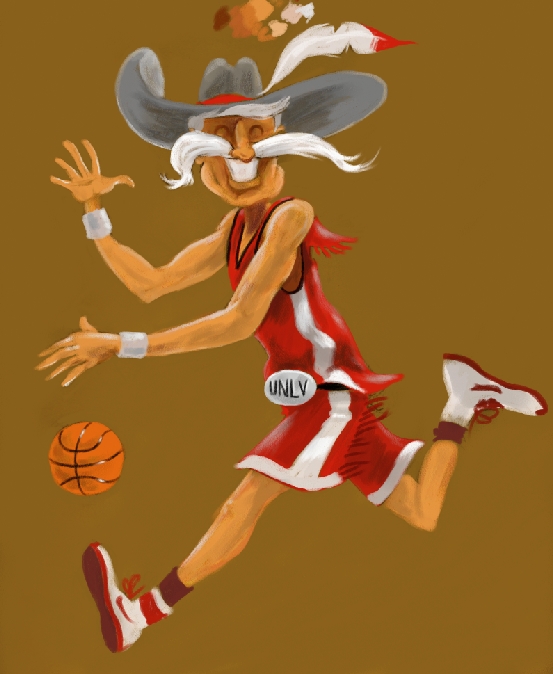
Step Nine, Final Details
Okay, I changed my mind. Deleting the pencil was fast, and gave me what I wanted, but I look at it now and realize it’s too flat. The flesh tones aren’t set apart from the background. I could try changign the background color but I think that’s way too easy, fast, and effective. I choose MORE DETAIL (Hahaha). Back to the CANVAS LAYER, same CHALK Brush, Dark brown for contrast, I scribble some depth.
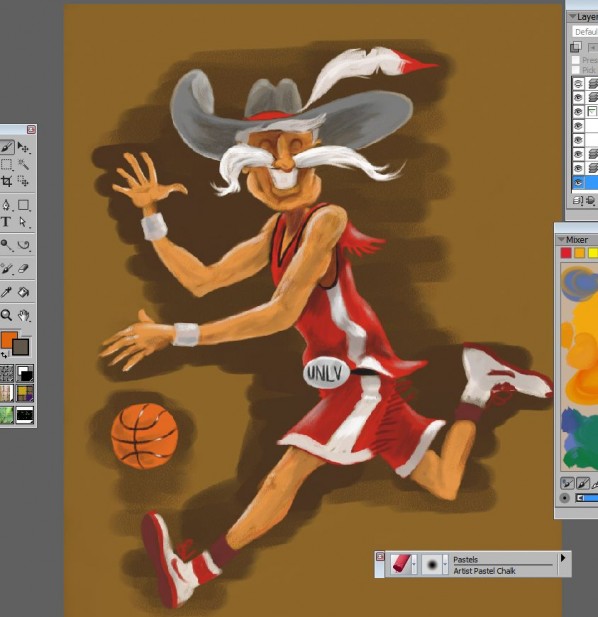
Another pass, with a soft touch and BLACK. I direct the strokes to reinforce my imagined light source and shadows.
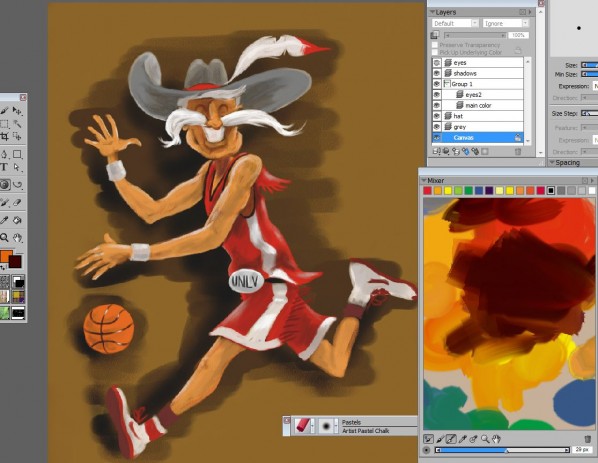
And now you’re done.
Time for tea, a brew, or the next cartoon. I encourage questions, comments or admiration. See you in the funny papers.
-Bryant
More Cartoons Like This:
- Easy Come Easy Go Easy.com Easy.go...
- Last Piece of the Puzzle Sitting down for my daily toon, i scribbled an artist...
- Call of Duty Modern Warfare 2 Gamer Calls in Sick Yay! Xbox Call of Duty 4: Modern Warfare went...
- Sexy Backless Dress Another fun tutorial for the folks at Cartoonaday. If you're...
- Kit the Fox and Barry Bear Play Spring Basketball cartoon Kit the Fox and Barry Bear Play Spring Basketball...


