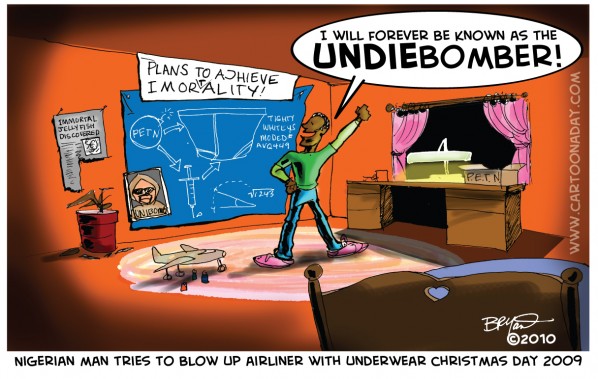
Nigerian man tries to blow up airliner with underwear Christmas day 2009
Nigerian man tries to blow up airliner with underwear Christmas day 2009. Plans to Achieve Imor(t)ality! Tightie Whities
Sad but true story. Yet another whackjob tries to blow up an airplane. Thanks to brave, everyday men and women, he failed. Here’s the whole story. And by popular request, I’ve been asked to make a workshop for my daily grind cartoons. Here’s how it’s done.
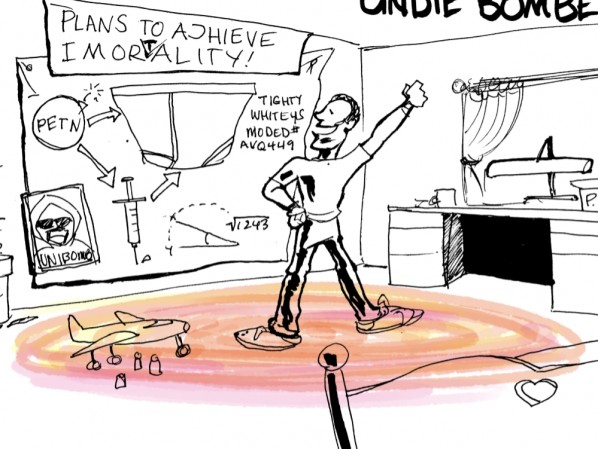
Lineart, step 1
As with 99% of my toons, they start with a good old pencil (lead holder with 6B soft lead) and paper (sketchbook of 100% recycled Stathmore White), which I then outline in ink. The type of ink varies from day to day, but the result is usually the same. Today was my trusty Mont Blanc Fountain pen ( I replaced the standard Mont Blanc ink with Koh-I-Noor waterproof India).
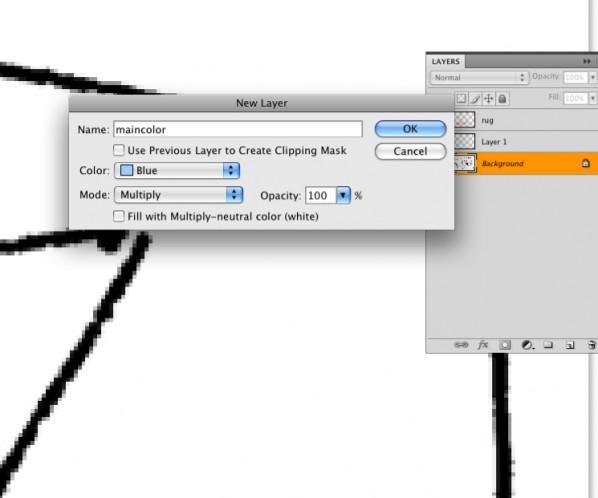
The above step shows the scanned image in Photoshop. I create a new layer and named it ‘Maincolor’. This layer is set to MULTIPLY so my coloring acts similar to watercolor paint which simply washes over the art, leaving the black lines visible. Today I’m using my portable Bluetooth WACOM tablet.
For my next little trick, I select out- the art on what will become a blueprint. COPY>PASTE to new layer. Use the wand to select the white and delete, leaving only the black strokes. There are numerous other ways to do this, but this works for the next reason. Now I INVERT the image, turning the black lines white. (Like a blueprint).
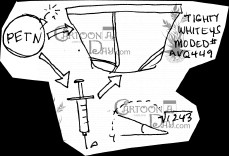
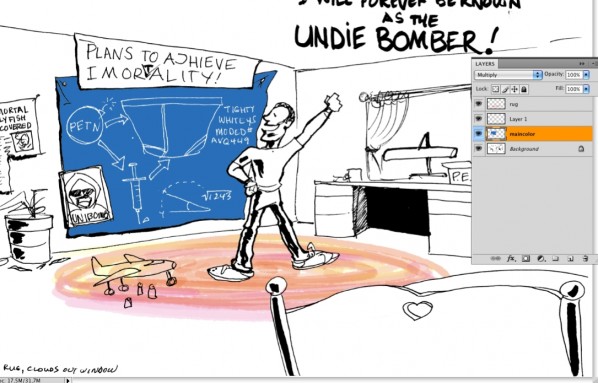
Step 2, Coloring Blueprint
Here’s the result of the blueprint step.
Step 3, Coloring
Step 3 is COLORING. Using the paint bucket is the fastest way lay down lots of color in these fun cartoons. Again, I make a NEW LAYER, set to MULTIPLY. On this blank layer, I grab the PAINT BUCKET, set to USE ALL LAYERS. This fills in the lines, even when there are no lines on the layer. This is one of my favorite Photoshop CS fixes. Prior to this software update, we’d have to do things like duplicating the inked layer and painting onto IT, while duplicating the inked layer AGAIN, moving it to the top of the layer pile, and making the white transparent using the LAYER OPTIONS. Now you just dump the color into a blank layer and it ’sees’ the outlines underneath.
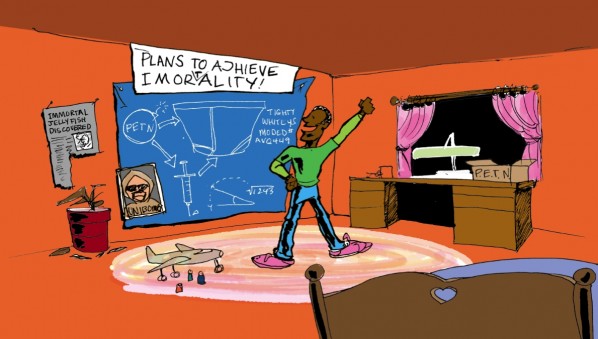
Step 4 Flat Color
The flat color is now laid down. This took all of about 5 minutes. If you’ve practiced this, you’ll realize it goes faster when your inked shapes are CLOSED, meaning no open holes in the continuous lines. Otherwise, when you click the shape using the BUCKET, you’ll fill in the entire image with your selected color. If that happens, don’t bother trying to re-ink. Simply switch to a solid BRUSH, using the same selected color (Orange for example), and paint just the lines, closing the open gaps in the lineart. Switch back to BUCKET and you’re in business.
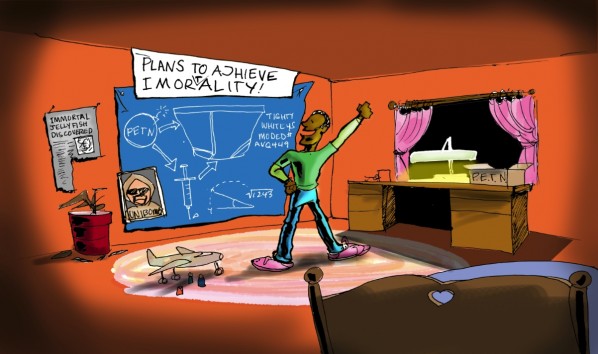
Step 5, Dodge and Burn
Step 5, is a stylistic one. I’ve now flattened the image and switch back and forth between the DODGE and BURN (O on the Keyboard) tools. Today being my Saturday and I’m still in my Pajamas, I wanted to create depth quickly. This technique is viewed by artistic purists as a crutch, but as a commercial artist, it’s invaluable. When time permits, I chose to accomplish depth using different values of “paint”, creating highlights and shadows with actual brushstrokes of lighter or darker color. But as I said, time is money and my Saturday is my own, so DODGE and BURN it is. This tool, once reserved for the darkroom and photography, quickly adds dimension and depth to an otherwise flat image.
NOW save, and get out of Photoshop, on to Illustrator. Once in Adobe Illustrator, I place the colored cartoon. Using the pen tool, I create the word balloons (White fill, black outline, and to add a cartooney flair to the lines, once drawn, apply a BRUSHSTROKE that varies width). Here’s where I also toss in a scanned, and converted to vector, version of my signature, the date, and the website address for those who borrow the toon and post on personal website (totally acceptable).
And that’s all she wrote. Sketch>5-10 Minutes. Ink>10 Minutes. Scan> 1 Minute. Color Fill>5 Minutes. Dodge and touch ups> 5 Minutes. Text, export etc.>5 Minutes. Total>30 Minutes.
This WORKSHOP BLOG took longer to compose than the actual cartoon. Have a GREAT DAY everyone! See you in the Funny Papers.
More Cartoons Like This:
- Easy Come Easy Go Easy.com Easy.go...
- Last Piece of the Puzzle Sitting down for my daily toon, i scribbled an artist...
- Call of Duty Modern Warfare 2 Gamer Calls in Sick Yay! Xbox Call of Duty 4: Modern Warfare went...
- Sexy Backless Dress Another fun tutorial for the folks at Cartoonaday. If you're...
- Purple Babe Crouched on Floor Illustrator-Vector artwork of gal sitting on the floor. 20 Minutes...


